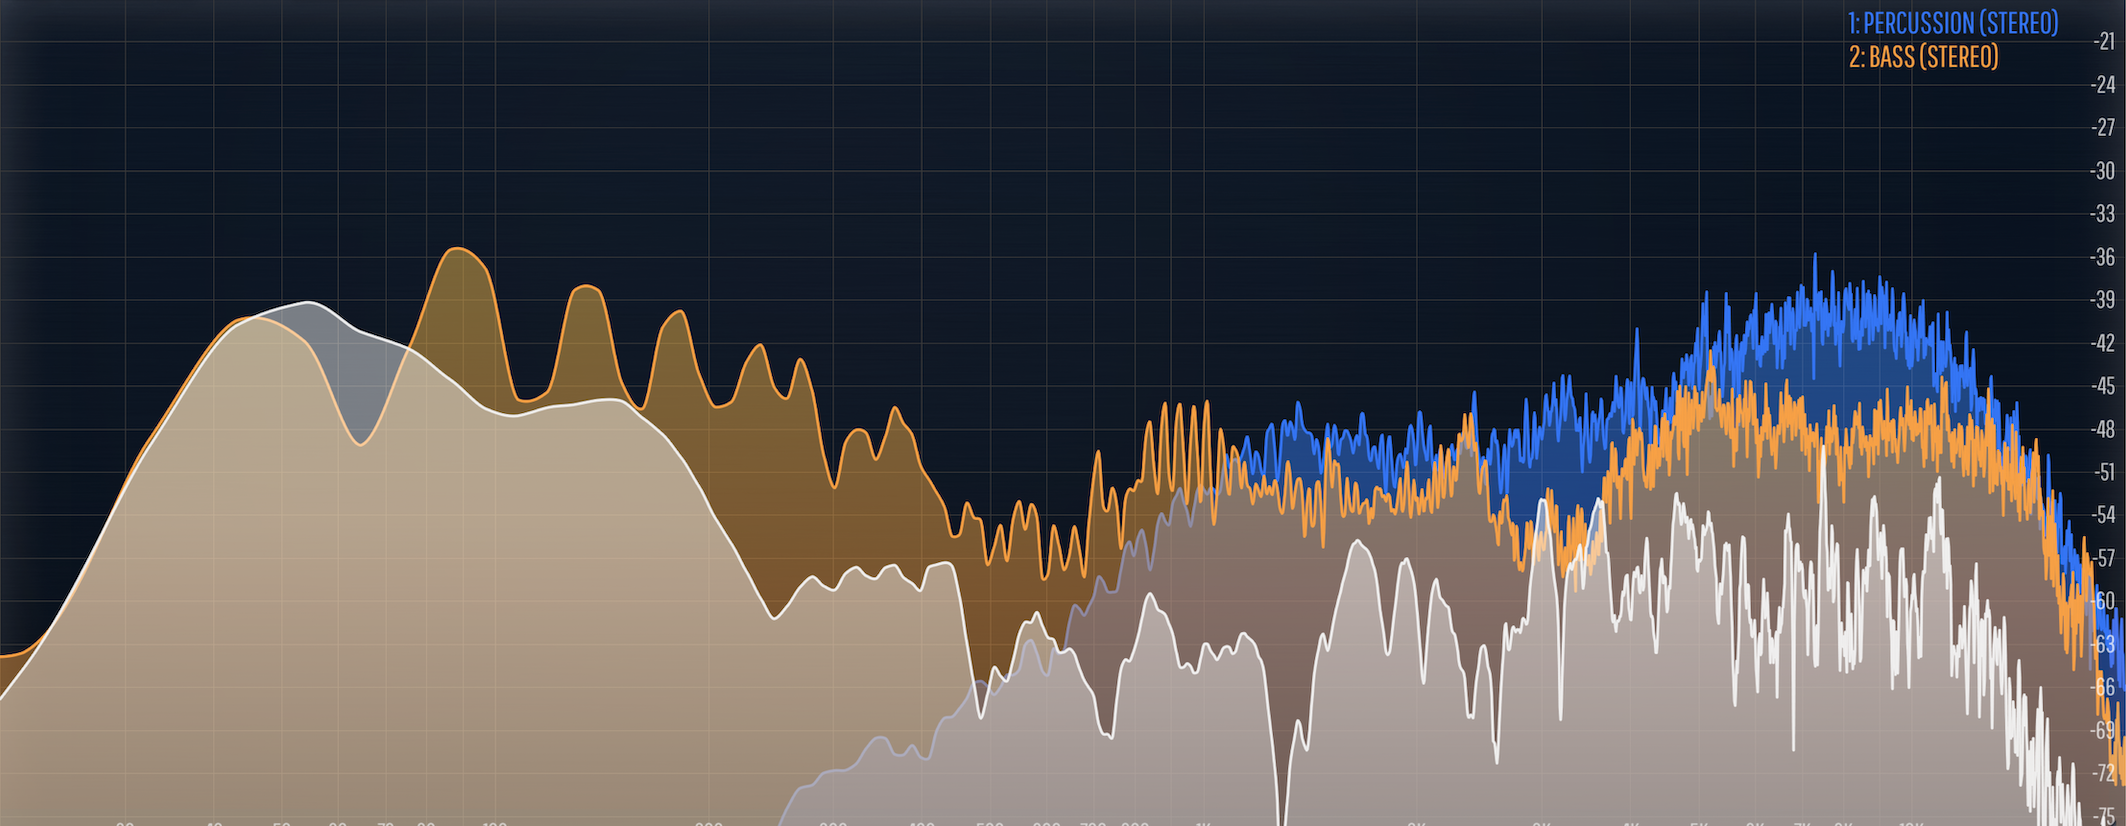
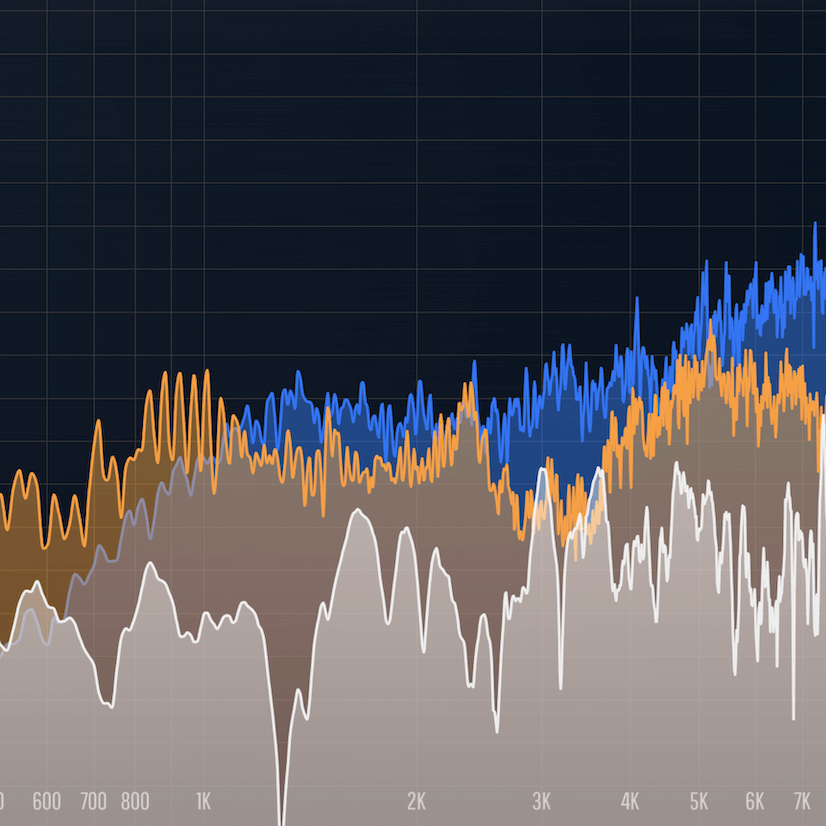
If you watched my video on Voxengo SPAN Plus, then you are probably here because you want to know more about how I use Span Plus along with tools like iZotope RX 8’s Music Rebalance module to understand sounds better. Well, you have come to the right place!
While I would argue that judging sounds with our ears and less with our eyes generally leads to better results, there is still a vast amount of valuable insight we can uncover from visual audio tools like spectrum analyzers and waveform editors. With this knowledge, we can make better decisions whether we are recording, mixing, or mastering. So in this blog, I will share my process for using this visual approach to learn more about sounds.
1. GATHER THE SOUNDS
The first step is to determine what kind of sound I want to analyze which is based on what my goal is. Perhaps I want a better understanding of mixing dubstep snares. Once I know the type of sound I want to analyze, I then have to go out and get it. The following are the sources I typically go to.
Sample Packs
Sample packs are a great source of information because you have direct access to individual sounds. However, one issue with websites selling sample packs is that they often provide a limited view of what sounds the sample packs contain. This does not mean you have to avoid them, but it is a drawback to keep in mind. Fortunately, there are several websites that allow you to view all the sounds of a sample pack. Websites like this include:
One important point to consider is how does one distinguish sounds that are worth analyzing from those that are not? After all, if I already knew how to distinguish good dubstep snares from bad ones, then this analysis would probably be unnecessary. In a sense, this situation is sort of a catch-22. However, our musical instincts will become wiser over time as our ears develop. In the meantime, we can use things like ratings and reviews (if provided) to estimate the quality of a sample pack. Also using a different source such as a professionally mixed song may serve as a better option which I will touch on.
Remix Competitions
Remix competitions are arguably a more useful source of information than sample packs. Not only do you have access to the individual tracks of a song, but you can also see the relative level differences and spectral relationships between them, which is very useful. Skio Music is one of my favorite places for finding stems. The nice thing about Skio is that it’s free to create an account and download the instrument tracks. Plus the songs are well-produced and some have even been mixed by prominent mixing engineers like Tony Maserati. One downside of Skio is that you are unable to download stems from past competitions. Another is that the diversity of music you can learn from is limited as they tend to be Pop. With that said, it’s still a great resource to get sounds from.
Professionally Mixed Music
While remix competitions are great, you will most likely not find the stems to the song you want. Sometimes you can get lucky and find them via a google search, but this will often not be the case. Do not worry though because we have some options here!
Depending on the sounds you want to analyze, you may be able to get away with simply sampling that sound right from the song. But what if the sounds we want are masked by other instruments? This is where the wonders of machine learning come in. We can use iZotope RX 8’s Music Rebalance module (available in the standard and advanced versions) to separate any song into four parts: vocal, bass, percussion, and other.
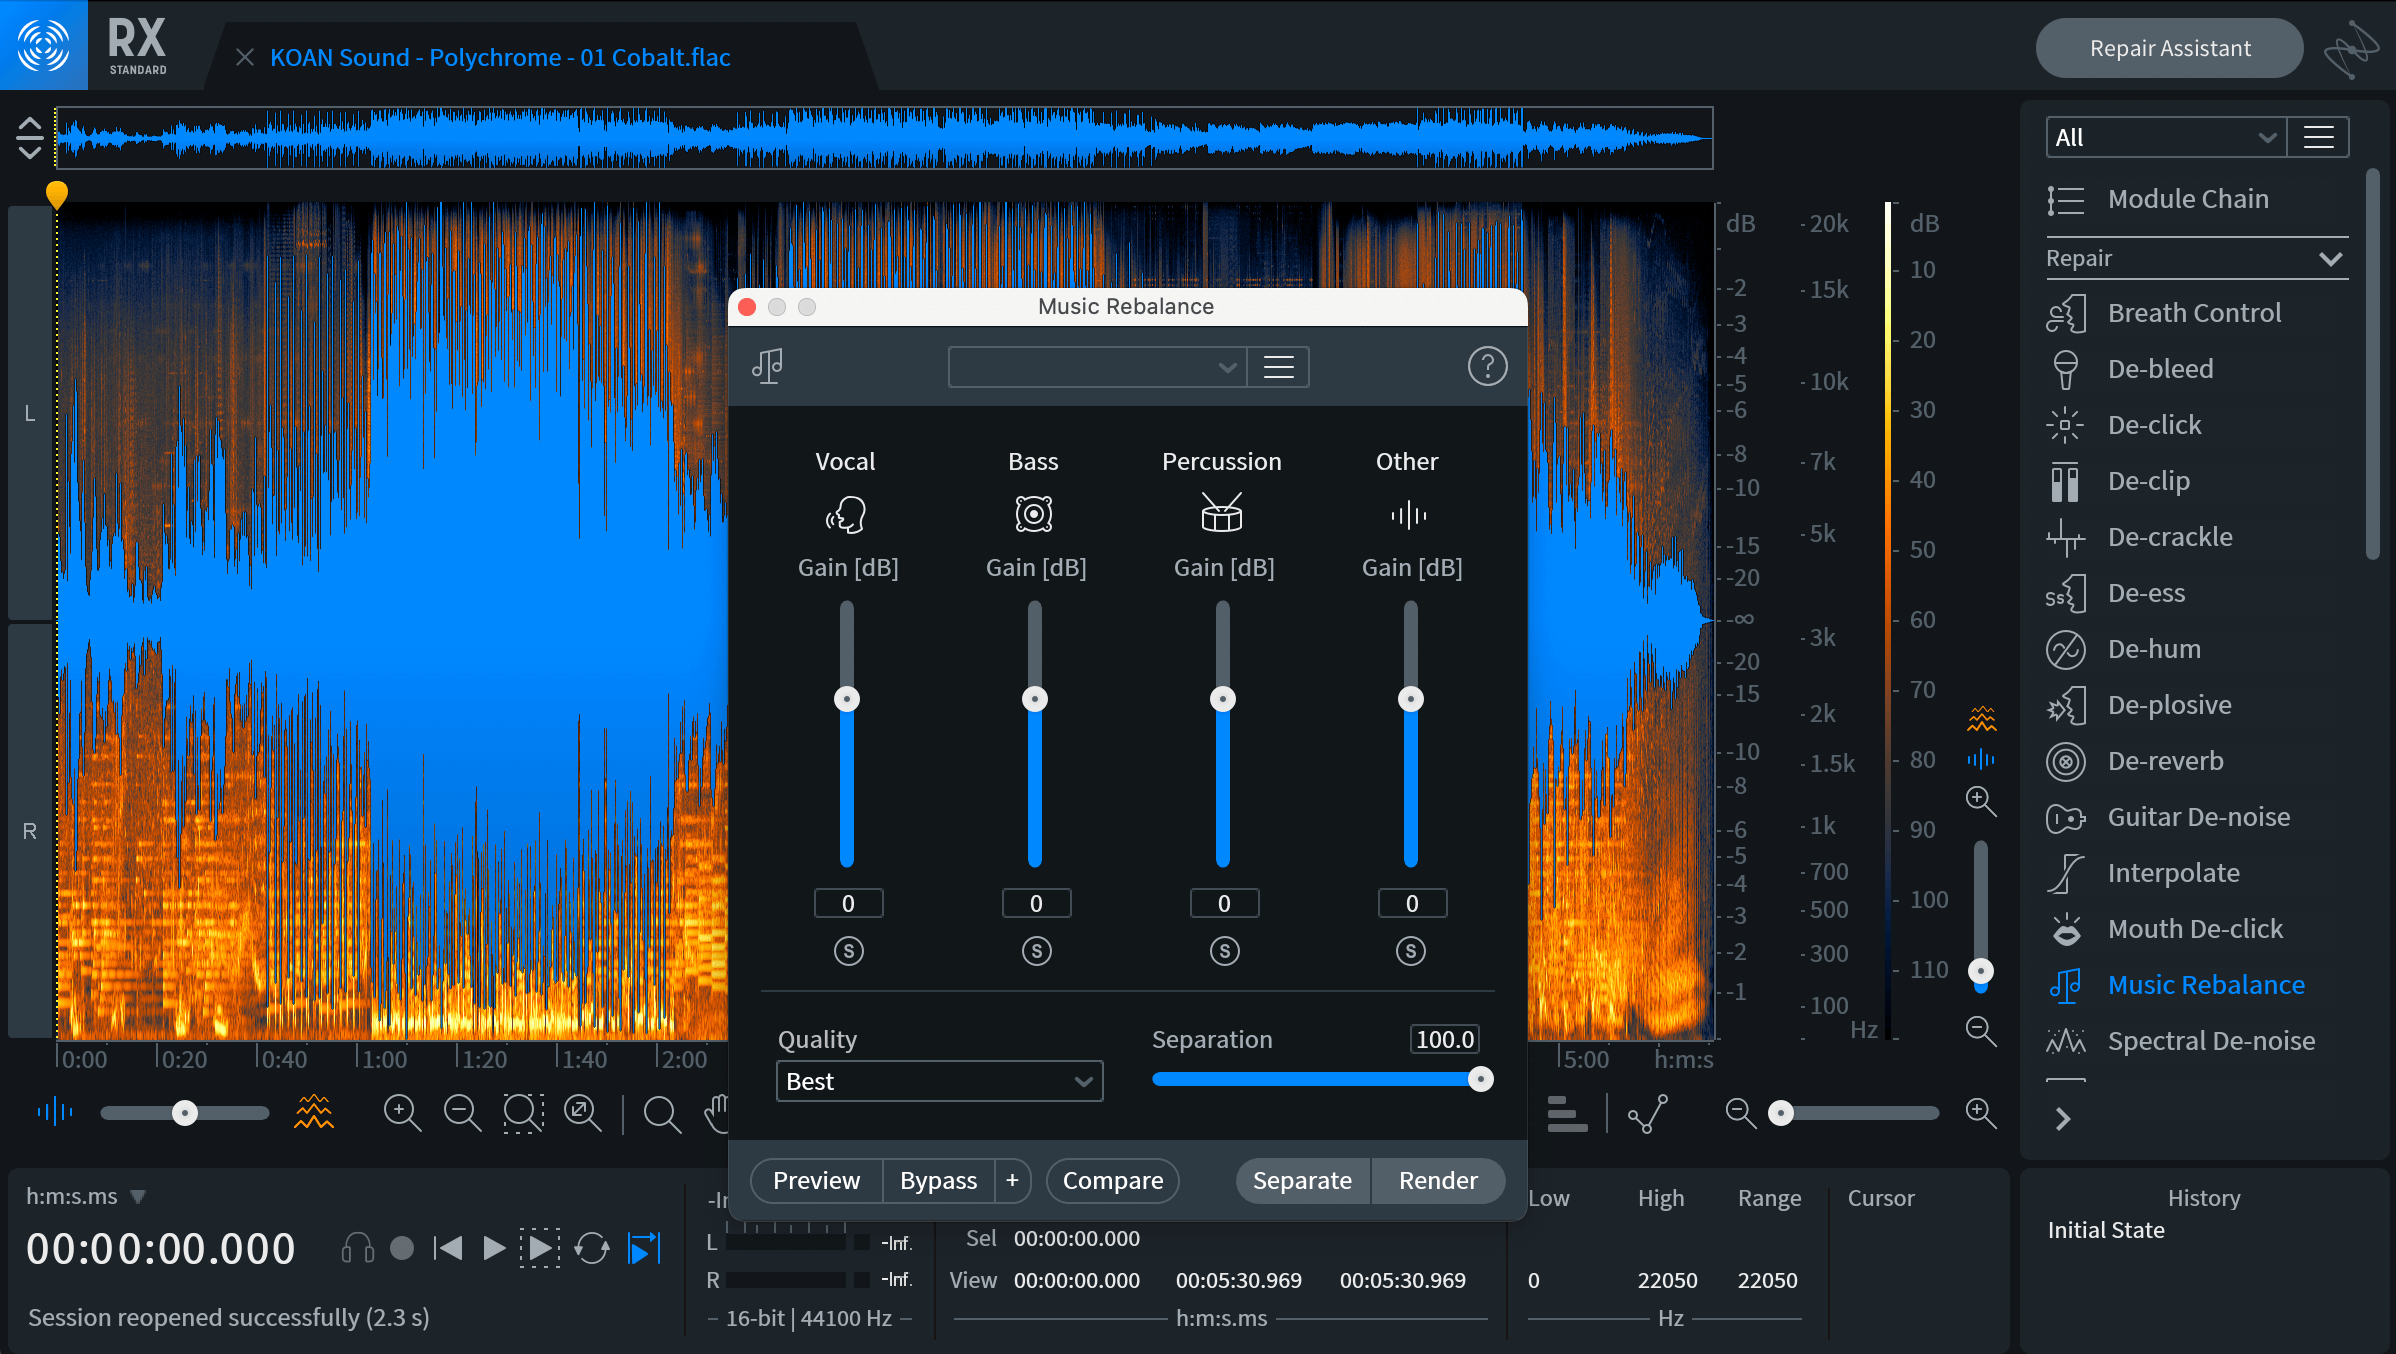
To do this, open RX 8 in standalone mode and import the song of interest. Then select a portion of the song that contains the desired sound. After, open the Music Rebalance module and set the quality to best and the separation slider to 100% to achieve the most isolation possible. Then click separate and Music Rebalance will split the song into the four categories. One drawback of Music Rebalance is that the separation quality can vary greatly depending on the song. In some cases, there may be more bleed from other instruments or artifacts like phasing or transient smearing. Therefore, it is a trial-and-error process. I personally like to stick to songs where Music Rebalance performs the separation well.
Also, I recommend using songs that are in a lossless format like .wav or .FLAC. However, lossy formats like MP3 and AAC are perfectly fine as well especially given how efficient the algorithms they use have become.
Plugins
Plugins that contain samples are another useful source for sounds. However, they have the same issue as sample packs in that you still need the ability to identify well-produced sounds. But that shouldn’t keep you from using them because that ability will develop over time.
Other
In addition to the sources mentioned here, there are others that can be helpful for finding sounds. One that may surprise you is Patreon. As a result of concerts and tours being canceled due to COVID-19, many artists have had to find additional ways to generate income and Patreon has been one of them. This is exactly what happened to electronic duo KOAN Sound. On their Patreon page, they have made sample packs and stems to some of their songs available to donating members.
2. CREATE THE SNAPSHOTS
Once I have the sounds I want to analyze, I create snapshots that will be used for analysis. My tools of choice for capturing these snapshots are Voxengo SPAN Plus, which captures the frequency profile, and RX 8’s spectrogram/waveform display, which captures the amplitude profile over time.
Let’s start with Voxengo SPAN Plus. Before you begin, I recommend opening the Spectrum Mode Editor window by clicking on the cog symbol in the upper right area and setting the block size to 4096 samples and Range Lo to -115 dB. Increasing the block size provides more detail with lower frequencies and decreasing Range Lo reveals frequencies that would have otherwise been cut off from the spectrum analyzer display.
Moving forward, I load the sound (say a kick drum) into my DAW which is FL Studio. Then I open an instance of SPAN Plus on the master channel and click on the Static button to open the Static Spectrums Editor window. Next, I loop the sound and then click Take to capture the frequency profile. For percussive sounds like kicks and snares, I click the take button after the sound plays and the peak meter is falling. If clicked too early, especially with kick samples, you won’t capture the fundamental frequency.
To illustrate this point, I took two screenshots of the same kick. The top one was taken after the kick sample played and the peak meter was decreasing, while the bottom one was taken before the kick sample finished.
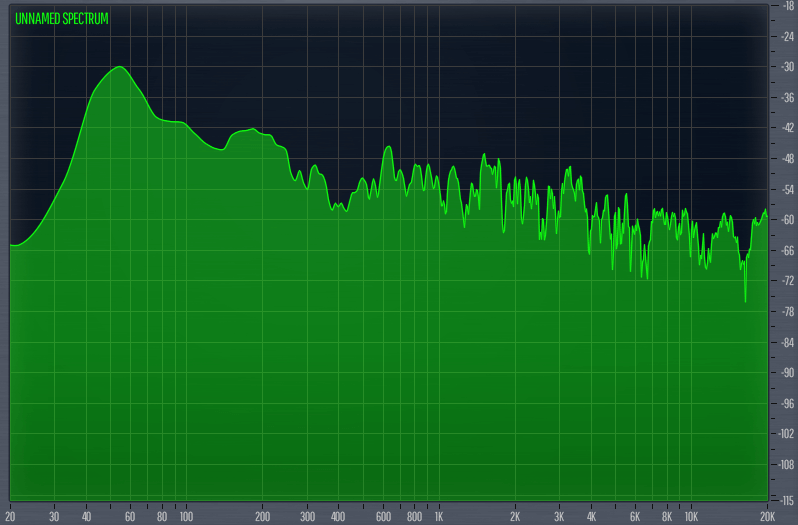
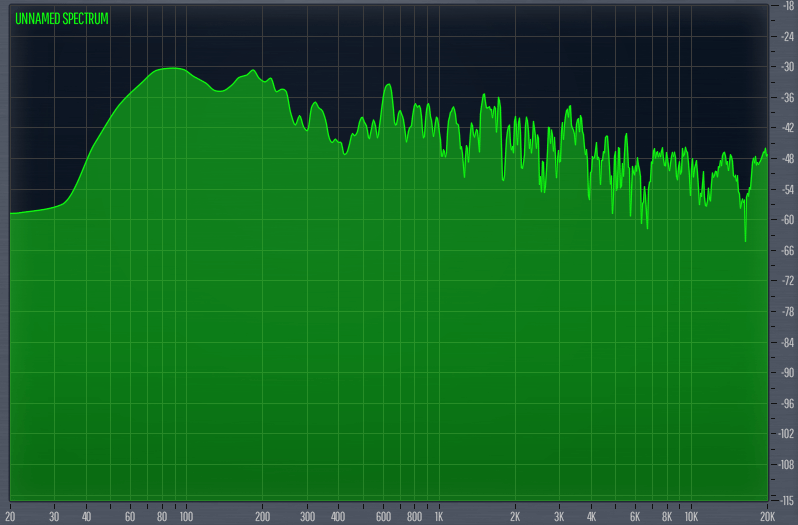
Now that I have a spectrum snapshot, the next thing I do is adjust the gain or height slider. I set the snapshot height so that either the fundamental or the tallest frequencies of the sound are at approximately -36 dBFS. The point of having this reference level is so that you become accustomed to seeing things in a certain way which makes it easier to compare sounds. So with the snapshot all set, I click save and meaningfully name the sound. To open a snapshot simply click on Load and select the snapshot file.
While Voxengo SPAN gives us information about the frequency distribution at a particular point in time, RX 8’s waveform display shows us information about the change in amplitude over time. I like using iZotope RX 8 for generating waveform graphs, but you can use whichever tool is available to you. If you are using FL Studio, for example, Edison is a great choice and it comes with the DAW.
After opening RX 8, I import and peak normalize the sound to 0 dBFS using the Normalize module. It’s important to peak normalize all of your samples to the same level because setting a reference level makes for effective comparisons. I use 0 dBFS because the waveform uses the full height of the waveform display. Once the sound has been peak normalized, I go to File > Export Screenshot and set the dimensions of the screenshot. I use 1874 x 926 because that’s the largest size RX allows me to export at. Whatever dimensions you choose, be sure to stick with it so that there is visual consistency.
3. UNCOVER THE PATTERNS
The last step is to analyze and take notes on the snapshots I took. Let’s take this snare drum sample for example.
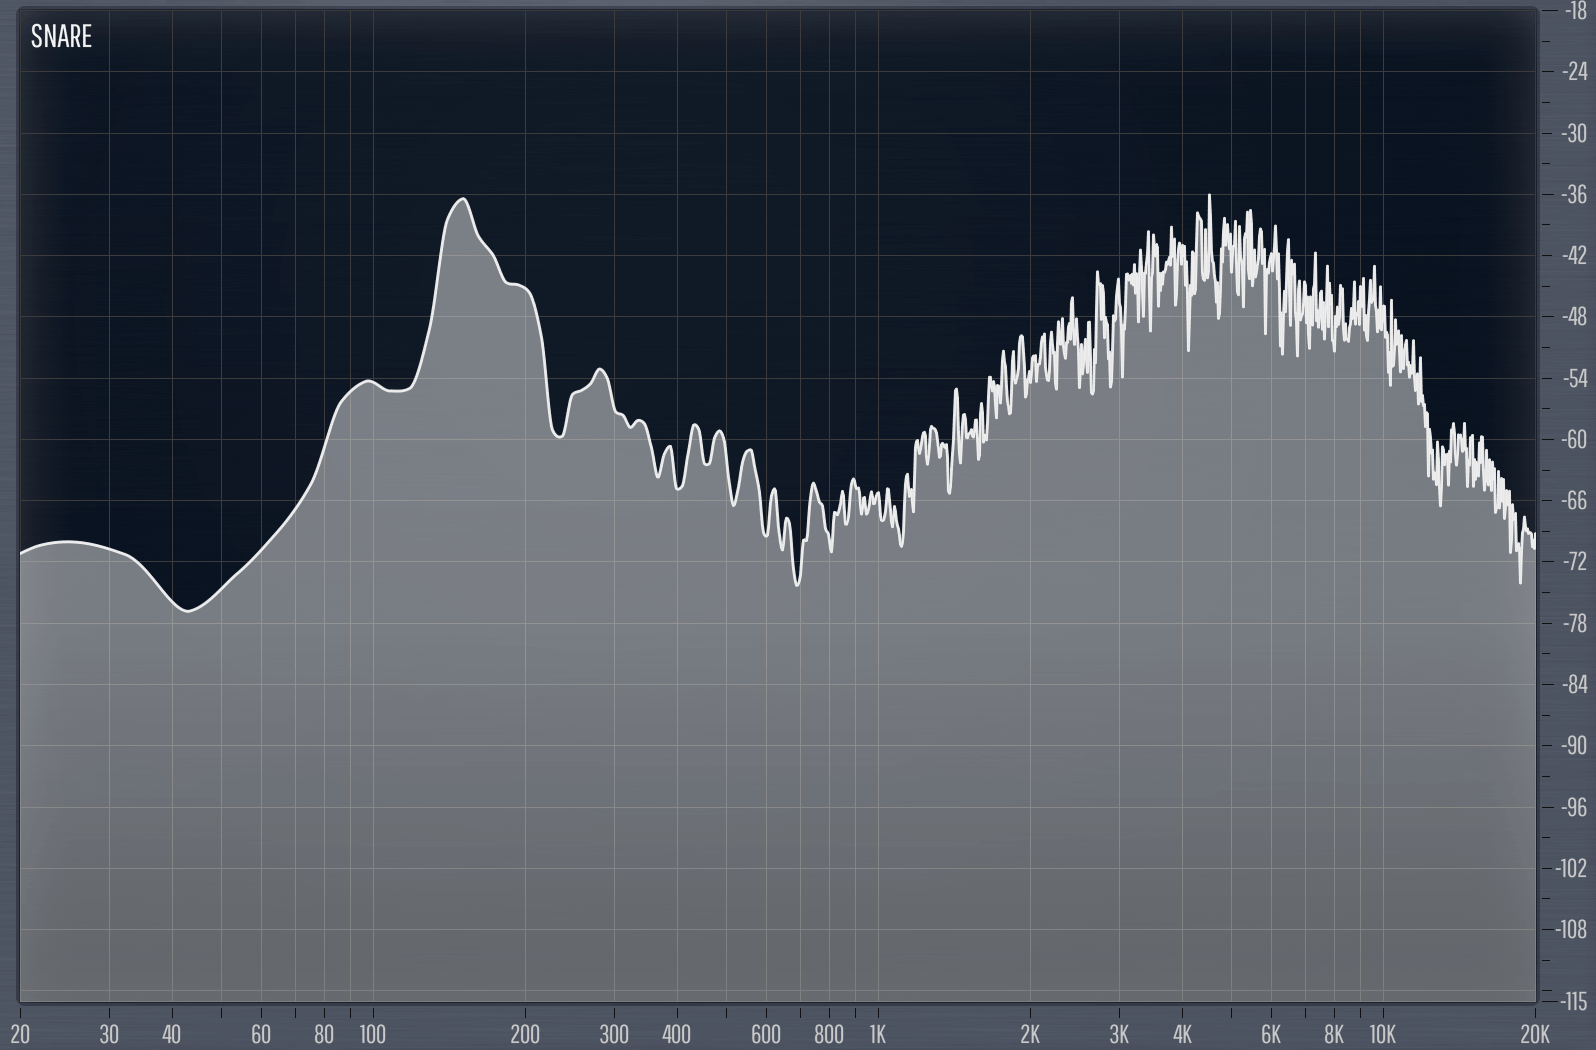
My notes on this spectrum snapshot would include things like:
- Fundamental frequency is 147 Hz which is note D3.
- Top end peaks between 3,000 – 6,000 Hz and is about 6 dBs lower than the fundamental frequency.
- Medium steepness roll off begins at 6,000 Hz and at 20 kHz is at about the same amplitude as the midrange dip.
- Sub frequencies are present and about 33 dBs lower than the fundamental.
- Overall shape is smiley faced, with its lowest area between 600 – 1,000 Hz.
Here’s a snapshot of the waveform display of that same snare.
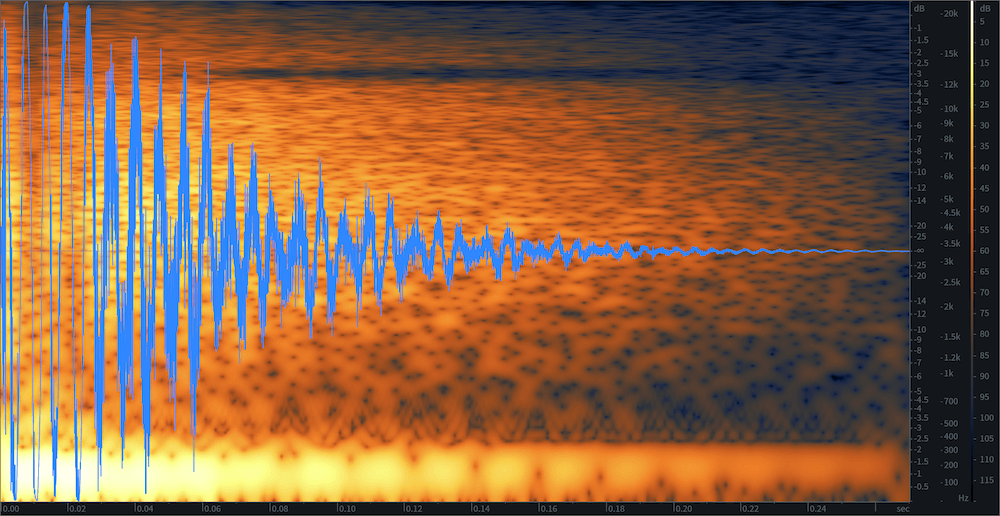
My notes here would include:
- The snare lasts for about 270 milliseconds.
- The beginning of the snare is mostly flat for about 30 milliseconds and then gradually declines for about 40 milliseconds.
- There is a sharp 6 dB decrease at about 60 milliseconds.
- From 60 milliseconds onward there is a medium decrease in amplitude.
After taking notes on a number of sounds, I do a meta-analysis on what I wrote and attempt to identify patterns between the snapshots. Not only do I try to find similarities between the sounds, but also their differences. Outliers or sounds that visually differ significantly from other samples should not be ignored but investigated because they can provide significant insight.
CONCLUSION
While I don’t suggest replacing your ears with tools like spectrum analyzers and waveform editors, they serve as a tremendous learning tool. As you take notes and discover patterns in the sounds you analyze, you can apply this knowledge to producing, mixing, mastering, etc. The patterns themselves don’t dictate whether you should or shouldn’t abide by them, they merely reveal what things are like. It’s up to you to decide what to do with that information.
I believe that taking this analytical approach is highly valuable and imagine there are others who would benefit from it. I think it’s a great starting point and as you go through the process you will probably come up with your own exciting flavor of it.